Saturday, September 04, 2021

Cort MR600F Acoustic-Electric Guitar

I seem to be seeing lots of Cort acoustic guitars of late, much more often than say; Yamaha. This could mean that the brand is steadily gaining favor with local musicians. On the other hand, it could also indicate that Yamaha guitars hold up better over time than Cort. 

In any case, here's an excellent example of Cort craftsmanship. The soundhole label identifies it as an "MR600F TGS NAT." I'm guessing that "NAT" stands for "Natural Finish," but have no idea what the "TGS" represents. Now, let's look at some specs. The majority was sourced from the Cort website, and a couple based on my own observations.

Construction: Dovetail Neck Joint
Body: Dreadnought with Venetian Cutaway
Top: Solid Spruce
Back and Sides: Okoume (African Mahogany)
Neck: Palaquium (Nyatoh)
Fretboard: Ovangkol (African Rosewood), 25.3" Scale, 20 Frets, Dot Inlays
Rosette: Vintage Style ABS
Top Purfling: Acryl Pearl
Bridge: Scooped Ovangkol
Electronics: Fishman Sonicore Pickup/Fishman® Presys II Preamp
Bracing: Advanced Scalloped X-Bracing
Pickguard: Faux Tortoiseshell


Wednesday, August 25, 2021

Seven Tones GA141 Acoustic Guitar | Part Three

Related Posts
Part One | Part Two | Part Three

YouTube Videos 

Part Three: Finishing Touches
Hi there. Glad you could join me for the final post on this gorgeous yet virtually unknown Seven Tones GA141. By now, matters relating to the fretboard had been adequately addressed; and it was time to wrap things up.

Once the orange tape had been removed, the fretboard was cleaned with 0000 steel wool and Zippo lighter Fluid [naphtha]; and reconditioned with a couple doses of lemon oil. As luck would have it, the genuine bone saddle and bridge pins had arrived; courtesy of Reco Music. I must say that the bridge pins were a bit pricey, but as Reco guarantees the authenticity of its merchandise; Acit was more than happy to part with his hard-earned cash.

The new bone saddle was all I'd hoped it would be; albeit a little on the tall side. To determine optimum saddle height, the stock saddle was used as a lab rat. Once I'd lowered it to the absolute minimum height, it was used as a template for the new saddle. The new saddle turned out to be way too tall to lower by mere sanding, so the first step was cutting, or rather sawing off part of the bottom. Once this had been taken care of; the desired height was reached after a few minutes of sanding.

The bridge already had ramps cut into it, but these were deepened and widened further to accommodate the lowered saddle. Here, once again, I'd like to remind readers that maintaining a sufficiently-sharp string break angle over the saddle is critical for optimum energy transfer and tone. After ramping the bridge, it was cleaned and reconditioned. No more dryness, and the purple-streaked wood came back to life.  

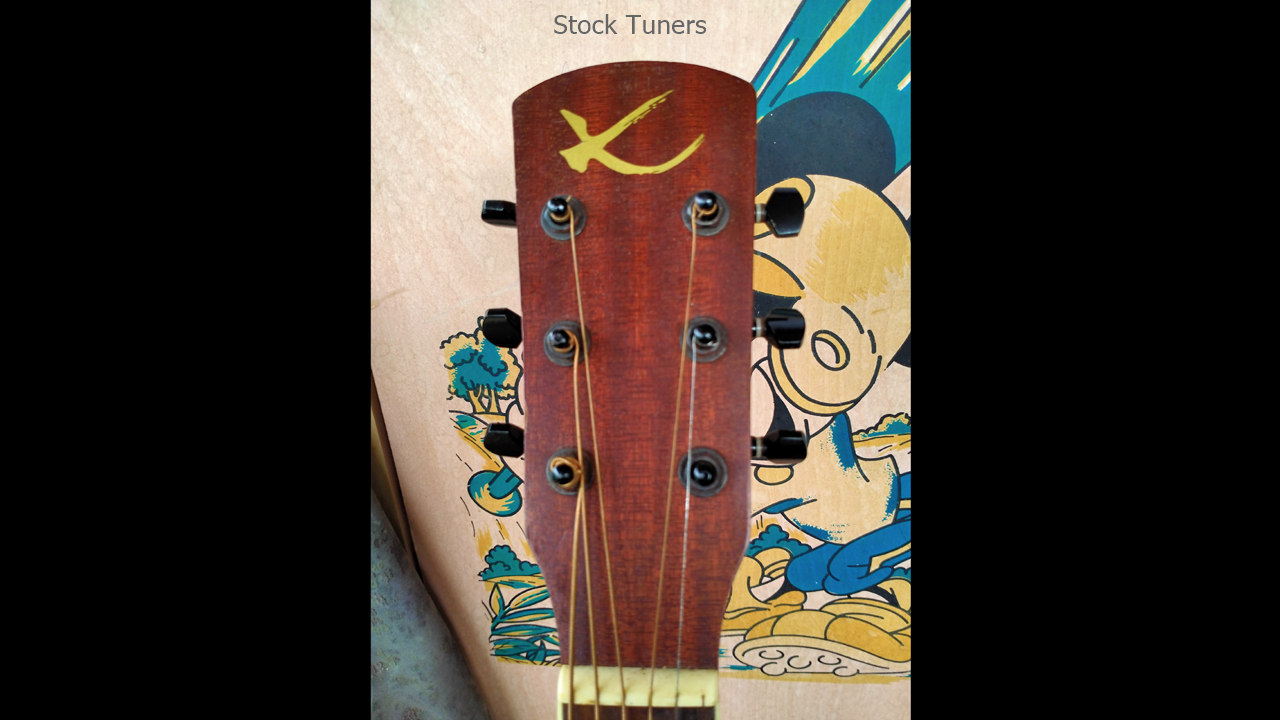
Meanwhile, a new set of Derjung DJ333C-M9 tuners was installed. These tuners were as smooth as could be; and that pleased me greatly. They were certainly light years ahead of the stock black-painted tuners, which had already started to corrode, felt gritty; and did not turn smoothly. 

A word of advice here, boys and girls. Kindly avoid cheap colored hardware as it's more often than not simply a thin coat of paint. That paint will peel off and/or disintegrate in no time at all, creating a rusty mess. The exception here is powder-coated or baked-on colored finishes; such as "Cosmo Black" offered by Ibanez. It would be fine, I suppose; as long as you can afford the asking price and the parts are compatible with your instrument. However, if you're on the hunt for affordable generic hardware; go for nickel or chrome plating.

Now everything was set for restringing and final setup. Acit is a fan of the resonant tones of bronze strings; and had provided me with a set of Martin MSP6000 80/20s [10 - 47]. Oh yes, these Martins were loads richer tonally than the Alice A306-XLs I'm familiar with. Loads more expensive too, I'm sure. All said and done, when Acit came to try out his newly-upgraded GA141; he was pleasantly-surprised at the huge improvement in tone, clarity; and playability. 

Well folks, this all goes to show that the care and feeding of your precious instrument is not something to be taken lightly. What you give your guitar, it will return ten times over; believe you me. And if you, like Acit, have unintentionally allowed your pride and joy to fall into decay; fear not! I'm here to help. Give CA Guitar Repair a call, SMS or WhatsApp message at 012-9855262. I cannot entertain walk-ins like I used to, thanks to the pandemic; but you can always book an appointment for a free consultation. Cheerio, see you soon.


Seven Tones GA141 Acoustic Guitar | Part Two

Related Posts
Part One | Part Two | Part Three

YouTube Videos 

Part Two: Fretwork
We'll start off with the cracked rosewood fretboard of the GA141, methinks. The crack was quite deep, so I filled it layer by layer with a mixture of rosewood dust and super glue. Once the hardened mixture had built up to a sufficient height, scrapers and abrasive paper were used to level and smoothen out the filled area. And, as you can see in the pictures below, the repair ended up being hardly noticeable.

On to fretwork then, more specifically; fret leveling and recrowning. For those unfamiliar with this procedure, the process of leveling and recrowning previously-installed frets is known as "fret dressing." The frets of this GA141 were dressed because Acit had complained of sporadic fret buzz throughout the length of the fretboard; especially in the higher registers.

First of all, the truss rod was tightened so that the fretboard was flat; that is with zero relief. This had to be done to ensure an accurate assessment of fret height later on. Once I had the fretboard as flat as I had intended, I used a Fret Rocker to gauge the height of the frets, three at a time. As it turned out, there were just too many high spots to deal with individually; and it would be more practical to simply level all the frets.

After protecting the soundboard with sheets of clear plastic, the fretboard was masked off with StewMac Orange Multi-Purpose Tape. Black permanent marker was then used to mark the whole length of each fret top. Following this, the frets were leveled in stages using diamond leveling blocks of various grits.

As can be seen in the pictures below, the first few passes revealed lots of black marker in the low spots. With successive passes, these black spots gradually started to disappear, indicating that the frets were closer to being of a uniform height. Once there were no more black [low] spots left, the fret tops were again carefully checked with the Fret Rocker to determine if there were any more high [and low] spots remaining. I'm glad to say that no more high spots were found, and I was able to proceed to the next step of the process.

The next step was recrowning the fret tops. This had to be done as after leveling, for the fret tops were as flat as an airstrip. Once again, the fret tops were marked with black permanent marker. Following this, the frets were recrowned using a combination of fine-toothed three-cornered files and a StewMac Z-File. The final result was a narrow black line down the middle of each fret top; which represented its peak or "crown."

So now we had frets that had been leveled and recrowned, but full of scratches from all that filing. To reduce these marks to the bare minimum, the frets were abraded with 3M Scotch-Brite Pads, 0000 steel wool; and 3M Flexible Polishing Papers. Finally, as a finishing touch; the frets were polished with Autosol Metal Polish. And with that, I humbly conclude this post. Thanks for visiting, and I'll see you good people real soon.


Seven Tones GA141 Acoustic Guitar | Part One

Related Posts
Part One | Part Two | Part Three

YouTube Videos 

Part One: Introduction
I could not find any useful information about this Seven Tones GA141 on the web. However, based on the model number and soundhole label [Designed and Established in Malaysia], I believe that Seven Tones is one of the house brands of L. Luthier Guitars. Well, as luck would have it, good buddy Thomas Yeoh was kind enough to contact L. Luthier. The information he received confirms that Seven Tones is a "sub-brand" of L. Luthier. However, they "no longer produce it." Muchas gracias, Thom :)

Beneath the dust and grime, this GA141 is a gorgeous and stunning instrument. The striping on the back and soundboard are to die for; I tell you! It belongs to Acit Sokalov, a cheerful young man who is into the more tender side of Pink Floyd, Eric Clapton and Peter Pan; amongst other musicians/bands. However, he'd been neglecting the upkeep of his instrument for far too long; and decided it was time to set things right.

As you can see in the pics below, dirt, grime and crud had taken hold of the GA141 and frankly; I was at a loss as to where to begin. After some serious discussion with Acit, we decided on a few matters. For one, the guitar needed deep cleaning and reconditioning. The fretboard and bridge had turned a chalky shade of grey, indicating extreme dryness. The wood was so dry that a crack had developed right where the nut met the fretboard end.

Now, the GA141 also needed fretwork and suffered from  uncomfortably-high action; so these issues would be given top priority. Next, Acit confided that he would like to upgrade his baby with a genuine bone nut, saddle and bridge pins. I had bone nuts in stock, but no saddles or bridge pins. These would have to be sourced online. Besides this, he'd noticed that the stock black-finished tuners were already rusty, and needed to be replaced. Once again, it would be an online store I would turn to.

That's about it then for this introductory post. Remember, there are two more posts on this GA141 for you to enjoy. And, as a bonus for this blog's faithful readers, Acit has also recorded three videos of himself playing his beloved guitar [after servicing and upgrades, of course]. I've uploaded these to YouTube as I believe this man is really talented.